Do you get tired of re-typing the same paragraphs or specially formatted text in your documents on a regular basis? Or maybe you have tried to solve that issue by opening previous documents to copy and paste text to your new document. No need to do that when you can “memorize” text passages with Word 2007/2010 Quick Parts.
Quick Parts allows you to create reusable formatted text, even tables, which you can insert instantly without recreating every time you need it.
A good example is the closing paragraph and signature in a letter. If your letter closing and signature is always the same, don’t re-type it or copy-and-paste it each time. Create and use it as a Quick Part!
Here is how you create your custom Quick Part. In this example I will do a closing paragraph and signature area. You only have to do this once, unless it changes.
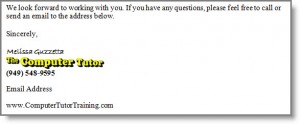
- Create the text in a Word document as you want it to appear in your documents. (Or you can open one that already exists). In the following example of a letter closing I have even used a picture logo.

- 2. Select the full passage you want included. In my example above, I will select from “We look forward… down to (and including) my website address.
3. Insert > Quick Parts > Save Selection to Quick Part Gallery.
4. Word will suggest a name for the Quick Part, but you can edit the name.
5. Word will save it in the General category of Quick Parts. However, you can create a new category of Quick Parts by clicking on Create New Category from the drop-down. Category examples: LetterClose, or Disclaimers
To use your Quick Part in future documents:
- Click at the spot where you want to insert the text.
- Insert Ribbon > Quick Parts > select your Quick Part from the list.
You should now see your entire closing and signature line! Every time you need to use the text – that’s all you have to do. Saves a lot of typing!
Another component of Quick Parts is the Building Blocks Organizer (I’ll call it the BBO). The BBO includes a list of built-in “document parts” you can use for instantly professional looking documents. Examples of document parts include cover pages, headers/footers, tables, text boxes, and more. A great way to check out how you might use the BBO is to explore it, try some out. Insert > Quick Parts > Building Blocks Organizer…
There are so many cool features to help make your work fast and easy in Microsoft Word. Stay tuned for more time-saver tips!
Like knowing the shortcuts? Our Microsoft Word Shortcuts “Cheat Sheet” is now available. Click here for more information.
Getting good training is the single most important thing you can do increase your computer productivity. That’s where we can help! Sign up for our email list on our home page and give us a call today.


